Here’s a step-by-step guide on how to use an inkwell for calligraphy:
Materials Needed:
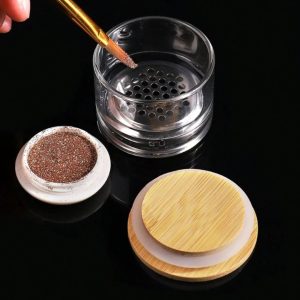
- Inkwell: Choose a well-designed inkwell that suits your style and preferences. It should have a wide opening for easy dipping and a stable base to prevent spills.
- Calligraphy Pen: Select a calligraphy pen or nib suitable for your writing style. There are various types of nibs, each producing different line variations.
- Ink: Choose a calligraphy ink that flows well and is suitable for your chosen nib. Ensure the ink is not too thick or too thin.
Steps:
- Prepare Your Workspace:
- Choose a well-lit and comfortable workspace.
- Cover your work surface to prevent ink stains.
- Position the Inkwell:
- Place the inkwell to the side of your dominant hand if you are right-handed (or to the left if you are left-handed). This allows for easy access without obstructing your view.
- Dip the Pen:
- Hold the pen at a slight angle and dip the nib into the inkwell. Submerge the nib about halfway or a little more, ensuring that both tines of the nib are covered with ink.
- Control the Excess Ink:
- Gently tap the nib on the edge of the inkwell or use the side of the well to remove excess ink. This helps prevent blobs and excessive dripping.
- Hold the Pen Properly:
- Hold the calligraphy pen with a comfortable grip. Experiment with different angles to find the one that works best for you.
- Write or Draw:
- Begin writing or drawing on your paper. Apply even pressure on the nib to produce consistent lines. Experiment with variations in pressure to create thin and thick lines characteristic of calligraphy.
- Re-Dip as Needed:
- Depending on the size of your writing or the ink capacity of your pen, you may need to re-dip the nib into the inkwell periodically. Be mindful of not running out of ink mid-stroke.
- Clean the Nib:
- If you switch ink colors or finish your work, clean the nib by rinsing it in water. Dry it thoroughly before dipping into a different color.
- Practice Patience:
- Calligraphy requires patience and practice. Experiment with different techniques and be forgiving of mistakes as you develop your skills.
- Cap the Inkwell:
- When not in use, cap the inkwell to prevent the ink from drying out.

